I recently got a new text processing program called Scrivener. It’s oriented towards the writing process; you don’t use it to format text and produce final output. You use it to outline, shuffle, and put down words. I think it’s awesome for pen and paper gaming work, and I wanted to document my current workflow with an extended example.
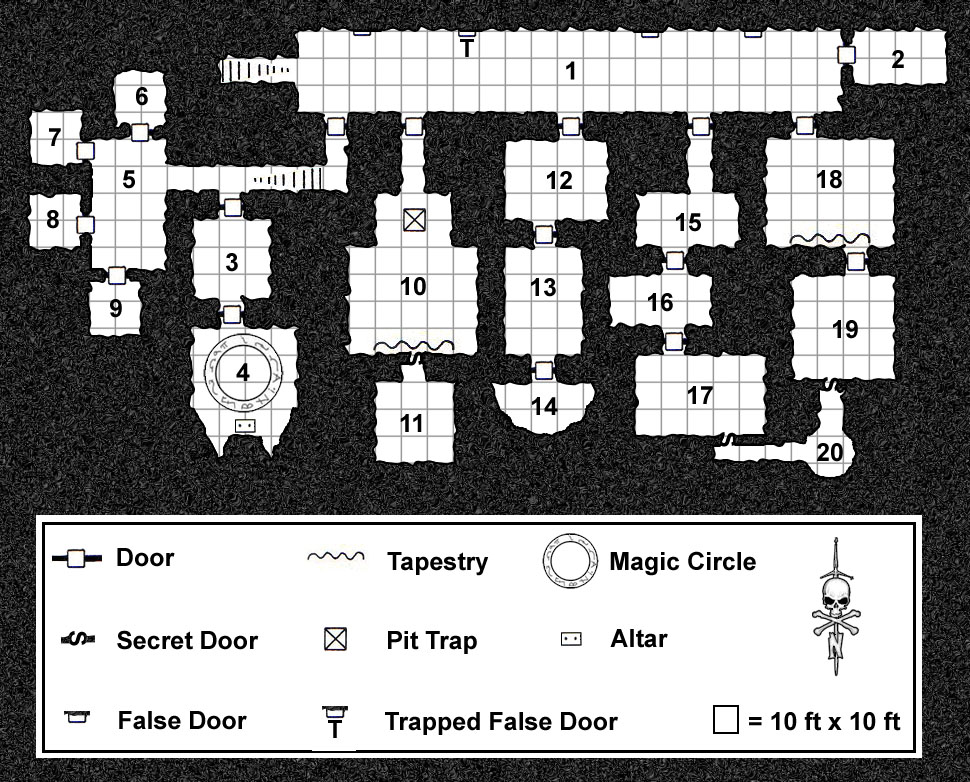
So I want to slam together a quick dungeon for D&D 4e, henceforth known as the Descent Into The Doomful Depths. We’ll say it’s going to be a single level for now, and I’ll aim it at my current group, which just hit 4th level. I’ll grab a map from the great collection of dungeon maps at Paratime Design — let’s use this one.
And now I’ll dump it into Scrivener. First interesting feature of the program: every project (which is what it calls a document) has a Research folder, and you can stuff text, images, PDFs, and Web pages into that folder. This is great for quick reference.
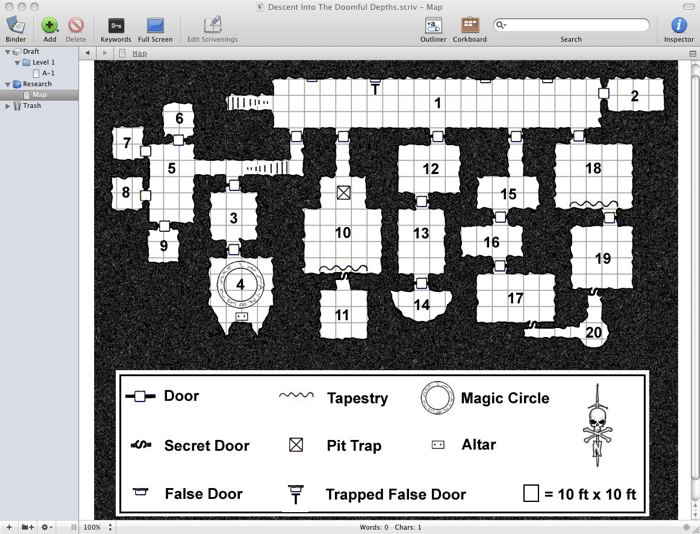
There’s the map again, inside the Scrivener project window. The left pane of the window is the Binder; it’s where all the pieces of the project live. The map is down in the research area, and I’ve added a folder and a document to the draft area. I’m using one folder per level, and a different document for each encounter. Since this’ll just be one level I don’t really need the folder, but you get the principle. Hm: I should also have set up a folder in the Research area for level 1. I can go back and do that easily enough, though.
By the by, if an image doesn’t fit into the Scrivener pane, you can resize it with a right-click. Very handy, particularly since there’s no horizontal scroll bar available. You can also view the contents of a pane at a different magnification using the popup at the bottom left of the pane.
Next I’m going to figure out which map areas have encounters in ’em. The Paratime Design maps are old school, aimed at 1st edition. In 4e there’s no way you’d have a single encounter in a 20 by 20 foot room. That’s OK, we can adapt! Each encounter will be multiple rooms, which is how WotC’s been doing it anyway. The dungeon may be a little cramped but hey, this is mostly a thought exercise.
Here’s the result:
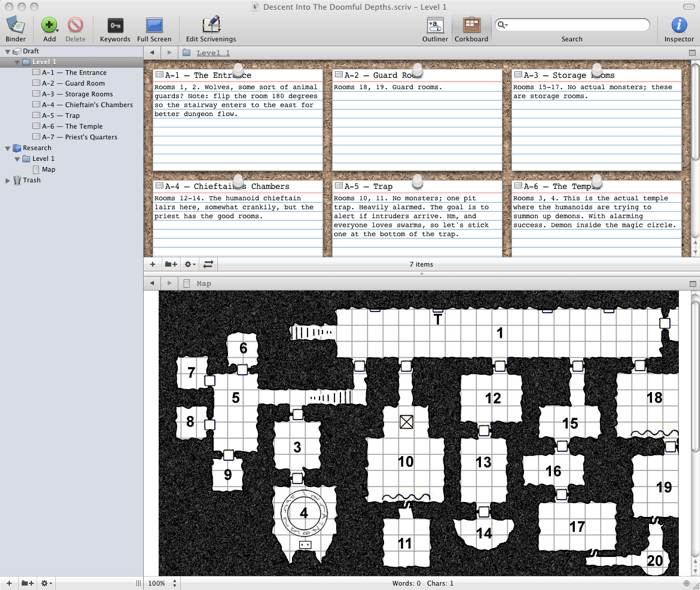
OK, now we’re cooking with cool. Things to notice:
I’ve split the main pane into two parts. The bottom one is showing the map. I can put anything in there; it doesn’t have to be one of the reference materials. The top half is the Level 1 folder in corkboard mode, which is sort of an overview mode. Each document in the folder has a card. I’ve added brief notes on what I want in each encounter by clicking in each index card and typing. If I was doing this for real I’d have figured out what kind of humanoid I want already… but as is, I’ve sketched out some sort of lightweight plot involving a bunch of bad guys who are trying to summon demons, and there’s some friction between the head of the tribe and the spiritual leader. Fun times.
Better figure out which monsters to use, though. I’ll do A-4 first. Time to fire up Safari and the DDI Compendium. This is a mild pain in the ass; my normal browser is Firefox. But the Compendium is behind a password, and Firefox doesn’t share cookies with Mac WebKit apps, so I can’t save Compendium pages into Scrivener with Firefox…
Uh. Sorry about that. Sans technical speak: I’m about to save off a bunch of monsters from the Compendium into Scrivener, and I need to do that from Safari for reasons you don’t care about. Right.
So I do a search on the Compendium. I need stuff around level 6ish, I want an elite soldier for a leader type, and the Compendium makes that pretty easy. Here we go:

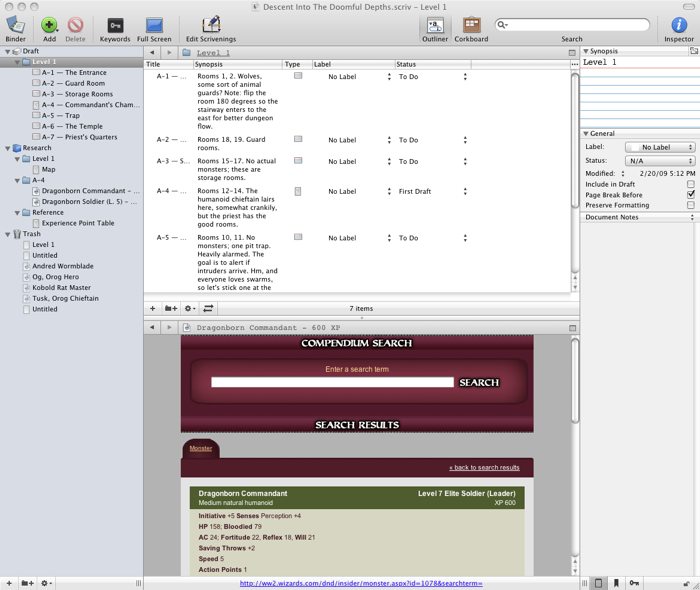
Plenty of good possibilities. I really dig the idea of making this a dragonborn thing, because PC races can be evil too, so hopefully that’ll work — but let’s save off a few potential leaders. I won’t worry too much about race. Anything can be reskinned. For each interesting leader, I drag the link from the search page into the Research folder for encounter A-4. Whoops, I should have put that folder inside the Level 1 Research folder, but never mind. Now, my Scrivener project looks like this:
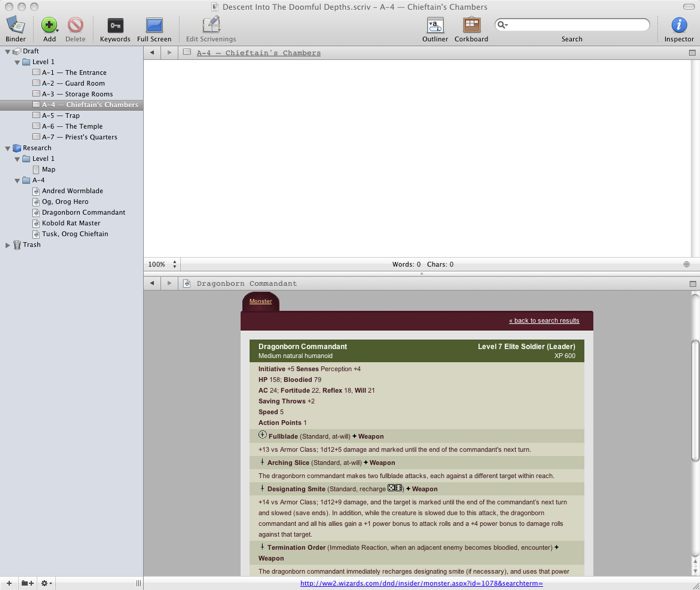
Big blank space in the top half of the main pane; the actual text of the encounter will go in there. Underneath, I’ve elected to display the Dragonborn Commandant. You can see everyone else I’ve saved as a potential leader-type in the A-4 folder in the Research section of the binder, to the left — Andred Wormblade, Og, and so on. Scrivener saves everything about the Web page, including images, so I don’t need to switch back and forth to my Web browser once I’m done gathering possible monsters. Also, I can cut and paste into the actual text, preserving formatting as I desire.
One down side: Web page titles aren’t preserved, so I had to retitle all those Web pages in Scrivener. But no big deal, took a couple of seconds.
As it turns out, there are enough dragonborn to fill out the dungeon, so I’ll go with the Commandant. I’ll use the Dragonborn Elementalist for the priest, maybe with a template slapped on top of him, and there’s a good candidate for reskinning as an acolyte. I’ve got plenty to work with: let’s delete the other guys and save off the other dudes I may use in the encounter.
Oh, and I’ll snarf a copy of the experience point table for quick reference while building the encounter. If I know I’m going to want to look at it over and over, it belongs in the Research section.
Here’s the final result for encounter A-4 with text filled in. Nothing special here: it’s just a text processor.

I copied the monsters into the text section for the sake of demonstration. In actual use, I probably wouldn’t bother, since I want to get the stat block on an index card anyhow; I’d just refer to the Compendium. If I was reskinning a monster, though, I’d copy it in, so I did that here to show off how it would work.
I’ll now mark this section as a complete first draft. First, I reveal a new pane to the right, the Inspector pane; second, I select the Level 1 folder and go into Outline mode.
I’m not using labels right now, although I would if it were a bigger dungeon; e.g., I might label this as a Dragonborn encounter, making it easy to scan through and pick out all the encounters of that type. I could also use the Keywords feature for similar purposes. In the Status column, encounter A-4 is marked as a First Draft. Everything else is still marked To-Do.
I could also set the Status, Label, and even Synopsis for the folder. Folders are really just a special class of documents. You can even associate text with them, which would be handy if I wanted to write a general overview of the entire level.
Three other little details visible in these last two screenshots: first, anything in the Research section also has a Corkboard view, which in this case I’m using as a quick reference to experience point values. Second, there’s a Trash, which saves deleted stuff in case one changes one’s mind. Third, if you look closely at the Level 1 folder in the binder, the icon for area A-4 has changed to reflect the fact that I’ve added text to it.
Pretend for the time being that I’ve finished writing up all the encounters. There are two ways to go at this point. First, I could run the dungeon right from Scrivener, which I haven’t tried but I expect it would work pretty well. Second, I can produce a document to edit elsewhere, which is what I actually will do since I don’t use a laptop at the gaming table.
This is in fact how Scrivener is designed, so I just select Compile Draft from the File menu. I have a bunch of options here. I can choose which sections are included in the export. I can choose whether or not I want to override any formatting I’ve done in Scrivener. I can insert page breaks before specific sections, or before folders, on a per-folder basis. I can convert em-dashes back into double hyphens and otherwise reconvert a document to simple ASCII. I can do HTML, RTF, Microsoft Word, and a few other formats. I’ll export to Word here, and then open that sucker up in Pages.
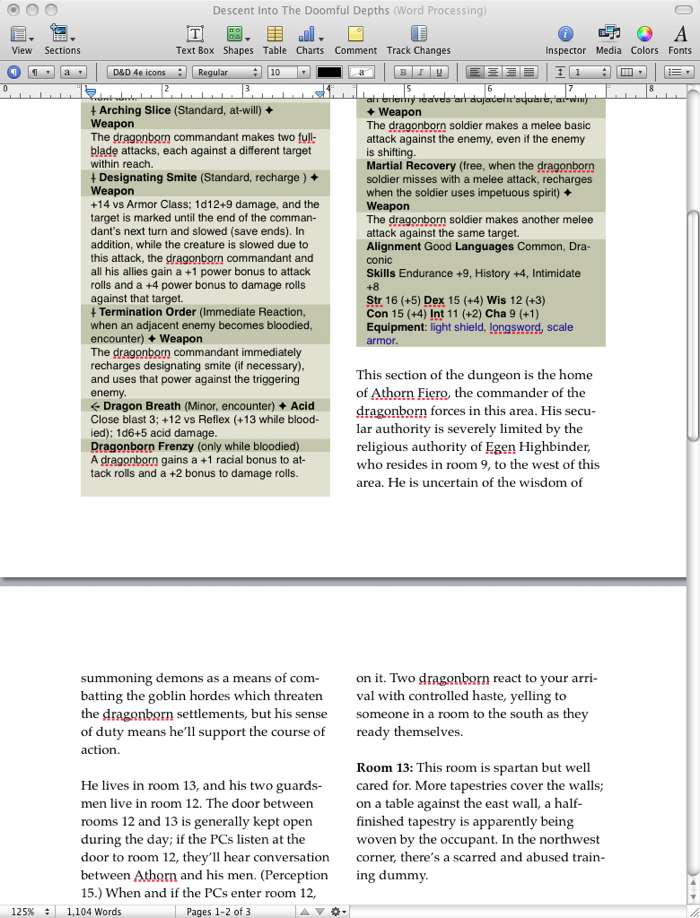
I have some styles pre-defined for monster stat blocks, so I reapply those as necessary. We hit one awkward point here: it doesn’t save images, so I lose the icons for attack powers plus the recharge dice. On the other hand, I have fonts for those so it’s pretty easy to add ’em back in, and as noted, I wouldn’t normally export this many stat blocks. Finally, I go to two-column, do my usual fifteen minute internal debate about getting fancier with the formatting, and then print the sucker out, ready to use.
Scrivener is $40, and I think completely worth it. The ease of compiling reference material is a huge win, and while you can do all that with multiple windows and apps, it makes a huge difference for me to have it all in one place. Not only is it easier to access, I don’t have to reopen everything when I come back to a project.
6 Comments
[…] Scrivener and RPG Writing via Population: One […]
I wonder if you could use a similar technique using Ywriter..
[…] more here – Population: One » Scrivener and RPG Writing. […]
[…] Scrivener and RPG Writing […]
Could you use this instead of a publishing program to make an RPG book? In your opinion would it produce the right end product? Thanks for any help with this question.
Nope — it doesn’t do page layout.